Rebody 250 California build thread for dummies

Pond

Zorg Guru (III)
British Zeds
Joined
Dec 26, 2016
Points
144
Location
Spaldingski, Lincs
Model of Z
Z3 project and E89 Z4
I am starting a new build thread, as I would like it to be kept on track to this particular build.
I would like this to be a thread for 'dummies' or 'novices' like me. I have absolutely no experience of building cars, or even mending them really.
If this build can be a help, or even maybe an inspiration, for novices like me to do one of these then all the better. I will catalogue all of the pitfalls I encounter as well as any tips I may pick up on the way.

Please don't post on this thread unless it is relevant to THIS build. These threads can become 'off topic' so easily and I would like it to be useful to this build and for others who may come across it in the future. I don't wish to seem rude as I am happy to discuss anything else on a separate thread. Thanks!
 

Pond

Zorg Guru (III)
British Zeds
Joined
Dec 26, 2016
Points
144
Location
Spaldingski, Lincs
Model of Z
Z3 project and E89 Z4
I acquired a really good condition 2001 3 litre Z3 with 54,000 miles in October 2023.

I had potentially come to a deal on a DNA (copy as DNA have not been operating for a good few years) kit when I bought the Z3.
It seemed sensible to me to buy the very best car I could; ie a 3 litre and low mileage with no rot, as the 'rebody' process for a 250 California is not cheap. I want my expense and hard work to end up in the best car it can be, something I struggle to understand if using a high mileage less desirable 'donor'.

Nearly four months on, I have stripped the body panels and sold them for good money (another advantage of buying a good condition low mileage car), stripped most of the interior and sold most of that, again for good money. Selling parts quickly was more important to me than realising the best price, as space is at a premium for me.

I have taken delivery of the new body panels; front half, rear half, bootlid, bonnet and door skins and bracketry for the body. I also bought many of the 'other' bits I will need from the body supplier. These include most of the 'brightwork' (with the exception of bumpers), lights, wiper motor kit, wire wheels and hub conversion.

One thing I learned from an early stage of research is that there is virtually NO information regarding installation of this kit or suppliers of parts on the internet. There is just ONE youtube video of the kit fitting; even this is not accessible unless you have the link. So finding people who have 'been there and done it' is imperative for people like me with no experience. I have found (so far) that those people are happy to help and give advice.

I have found it very useful to make a list of possible parts suppliers and their websites. I have also tentatively enquired to many before ordering anything.

So I am just about to 'dive in' and start the biggest project of my life with very little idea of what I am doing. I feel a lot more confident now than four months ago, thanks to much research and the help of others, but it is still extremely daunting.

I am the type who likes to do the very best at whatever I do; I don't like making mistakes, so will spend many hours making sure I only do something correctly (and once). If I can complete this, then I think anyone can (with half a practical mindset).
 

Pond

Zorg Guru (III)
British Zeds
Joined
Dec 26, 2016
Points
144
Location
Spaldingski, Lincs
Model of Z
Z3 project and E89 Z4
I have now installed the main bracketry for the kit. As mentioned above there is only ONE resource for reference on how and where to fit all of the parts required to fit the kit.
I referred to this only resource and found that my bracketry was missing several key parts. So rather than try to make sense of how, and why, the seller has 'adapted' the kit, I decided to just go backwards and replicate the missing parts to match with the ones on the only resource I have. It is the only way I am going to make sense of how it all goes together.
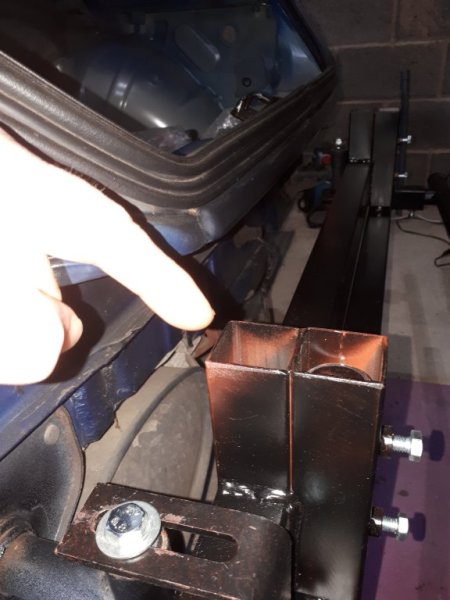
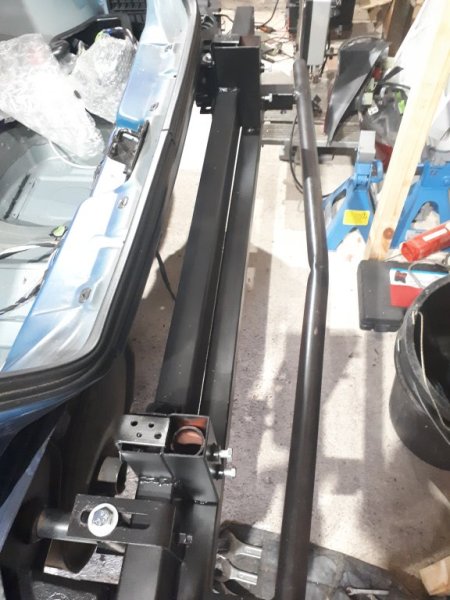
20240212_121054.jpg20240212_121124.jpg
The front and rear brackets should have had threaded rods and adjustable 'turntables' at the points shown on both sides.
20240229_152126.jpg20240229_152545.jpg
I made four adjustable brackets to replicate the missing ones. These were fashioned from angled bar as used in the building trade. They are plenty strong enough and don't need fabricating by a third party.

I was also missing the two bonnet hinge mounting brackets as my seller decided to do this a different way but, again, I needed to get the brackets back to how they would have been originally to make sense of fitting. Luckily a forum member, @Jezza, came to my aid (again) and I managed to buy a pair of brackets from a really helpful guy who makes these kits. Thanks both!
20240229_151905.jpg
These are the bonnet mounting brackets installed.
I also was supplied only half of the new wiper motor bracket, so made the rest up, again by fabricating it from some builder's strap.20240229_151956.jpg
 

Pond

Zorg Guru (III)
British Zeds
Joined
Dec 26, 2016
Points
144
Location
Spaldingski, Lincs
Model of Z
Z3 project and E89 Z4
As my car is to be red and the Z3 is (was) blue, I have been spraying the parts of the car that will or could possibly be seen once the body is on.
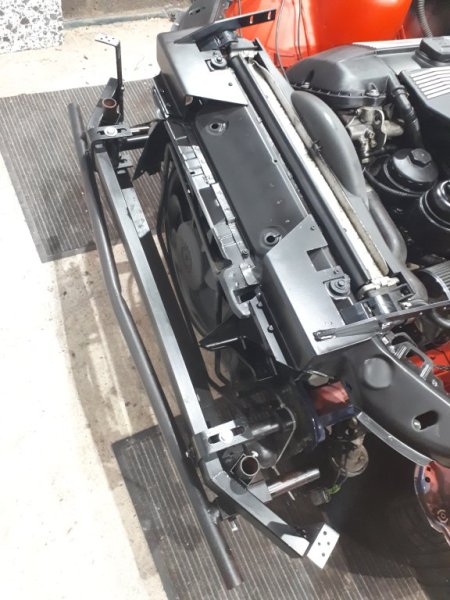
The front parts which can be seen through the front grille have been painted satin black.
20240229_151919.jpg

On the subject of paint, I bought the satin black from www.toolstation.co.uk, as it was just £5.99 for a 500ml can. It's very good aswell!

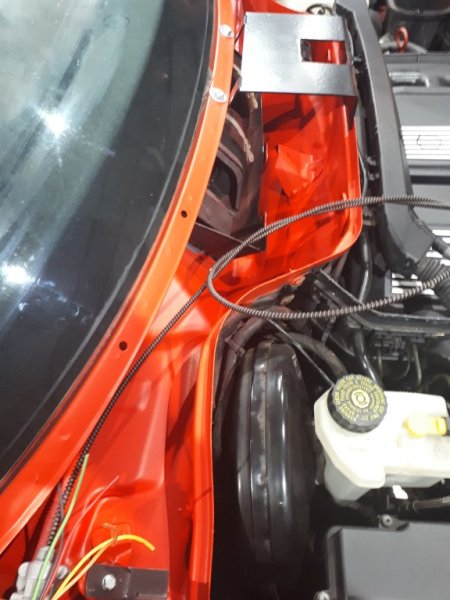
I have cleaned and de-greased the front inner wings and scuttle and painted these in RAL3020 paint. It is bright red (although it looks quite orange in the pictures). The car will be painted in a different shade but the RAL colour is close enough for parts which won't be on view very often. I haven't bothered to clearcoat these parts, as don't consider it necessary.
20240229_152048.jpg20240229_152635.jpg
 
Last edited:

Pond

Zorg Guru (III)
British Zeds
Joined
Dec 26, 2016
Points
144
Location
Spaldingski, Lincs
Model of Z
Z3 project and E89 Z4
I am still cutting bits off the GRP in the garden in an attempt to get my head around how it's going to fit together.
I am now starting to sand the moulding ridges and ribs.
Doing all this outside is a problem as the weather has not been good. Taking a lot longer than anticipated. I also have no idea what I'm doing, so am erring on the side of caution with everything.
I do know that the boot doesn't fit at present. The bonnet just about fits but will need work. The cills are nowhere near and the rear body piece has twisted from being left outside for God knows how long before I got it (which is now 3 months).

First trial fit of the body is imminent. Just got to get the wife on board to help, as I don't have anyone else nearby.

Tomorrow I am going to give my local GRP painting specialists a call and discuss what they recommend I do regards filling and sanding. I am lucky in having a nationally respected GRP painters about 5 miles up the road. They will be painting it, eventually..

My thinking is that if I ask them what they require, it may save me a lot of wasted effort, time and money if they say afterwards "that's no good. We will have to do it all again".

I have stainless steel bumpers and overriders arriving soon. I have nearly all the bits I need sat in boxes in various places around the house.

I am thousands and thousands of pounds poorer and still have a Z3 which is no good to anyone, some GRP lumps in the garden, and boxes full of very expensive 'ornaments'.

Things are not going well at the moment. No choice but to bite the bullet and get on with it.
 

Pond

Zorg Guru (III)
British Zeds
Joined
Dec 26, 2016
Points
144
Location
Spaldingski, Lincs
Model of Z
Z3 project and E89 Z4
One 'skill' I have pretty much perfected now, thanks to this, is using a 4 1/2" grinder like a surgeon uses a scalpel.
Always useful! :rolleyes:
 

Jam03

Zorg Guru (III)
Supporter
British Zeds
Joined
Feb 21, 2022
Points
136
Location
Surrey
Model of Z
2.2i
You in a few months after getting your wife on board:
699594C2-816A-4829-AC95-59BB1146D11E.jpeg
 

Duncodin

Zorg Guru (III)
Supporter
Joined
Sep 8, 2021
Points
139
Location
Krähental
Model of Z
M44 FrankenZed
I am still cutting bits off the GRP in the garden in an attempt to get my head around how it's going to fit together.
I am now starting to sand the moulding ridges and ribs.
Doing all this outside is a problem as the weather has not been good. Taking a lot longer than anticipated. I also have no idea what I'm doing, so am erring on the side of caution with everything.
I do know that the boot doesn't fit at present. The bonnet just about fits but will need work. The cills are nowhere near and the rear body piece has twisted from being left outside for God knows how long before I got it (which is now 3 months).

First trial fit of the body is imminent. Just got to get the wife on board to help, as I don't have anyone else nearby.

Tomorrow I am going to give my local GRP painting specialists a call and discuss what they recommend I do regards filling and sanding. I am lucky in having a nationally respected GRP painters about 5 miles up the road. They will be painting it, eventually..

My thinking is that if I ask them what they require, it may save me a lot of wasted effort, time and money if they say afterwards "that's no good. We will have to do it all again".

I have stainless steel bumpers and overriders arriving soon. I have nearly all the bits I need sat in boxes in various places around the house.

I am thousands and thousands of pounds poorer and still have a Z3 which is no good to anyone, some GRP lumps in the garden, and boxes full of very expensive 'ornaments'.

Things are not going well at the moment. No choice but to bite the bullet and get on with it.
Doing lights. Chromework, fettling the mold lines ?? And you haven't even got the body on? Not even loosely?

Sounds like you're procrastinating and, dare I say, getting a bit disheartened?

The same day my kit arrived I had the big front and back panels resting on the car. Best place to store them. Also seeing, roughly, what it was going to look like is a great motivator.

Getting over a really bad cold and cough that seems to have dragged on for weeks I was feeling disheartened about everything and done no work on it for too long. So tuesday evening I strapped on the plates and just took it out for a drive. Covered in grp dust and still showing the mold lines and mucky hand marks I musta looked like I'd just dragged it out of a chicken shed. Inside the car it was full of dust and grp fibre it was like sitting in a snow globe. But I loved it. Just what I needed. Still full of cold but yesterday with renewed enthusiasm I sanded down all the mold lines and itching to get back out there today.

Stop fiddling. Get the body on :)
 
Last edited:

Pond

Zorg Guru (III)
British Zeds
Joined
Dec 26, 2016
Points
144
Location
Spaldingski, Lincs
Model of Z
Z3 project and E89 Z4
Sounds like you're procrastinating and, dare I say, getting a bit disheartened?
Just a bit! :(

I want to do everything I can to the body while it is still outside. Obviously there is a lot I can't do until I see the fit (or not).
I can't keep taking the body in and out of the garage, as it is tight for space and I don't want to p*** my wife off (as she is the only one I have to help), or damage anything.

But yes, you are right. Talking about it ain't gonna get it done.
 

Pond

Zorg Guru (III)
British Zeds
Joined
Dec 26, 2016
Points
144
Location
Spaldingski, Lincs
Model of Z
Z3 project and E89 Z4
I am changing this thread to just a general build thread for my project.
My initial idea was to hopefully provide the experiences of a 'first timer' to other people new to these rebodies. However, there is very little point in this, as virtually no-one is ever going to build another 250 California.
To my knowledge there only three people moulding and selling these kits.
Two of them I would definitely not recommend to anyone; their kits are terrible quality as well as extremely expensive. The only other person, while a good chap and building quality cars, will not sell a bare kit (which I don't blame him for TBH).

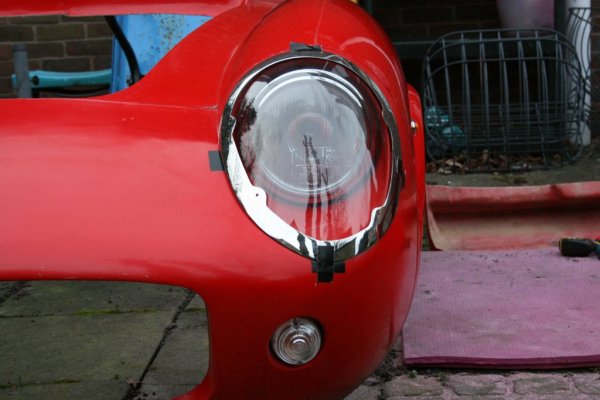
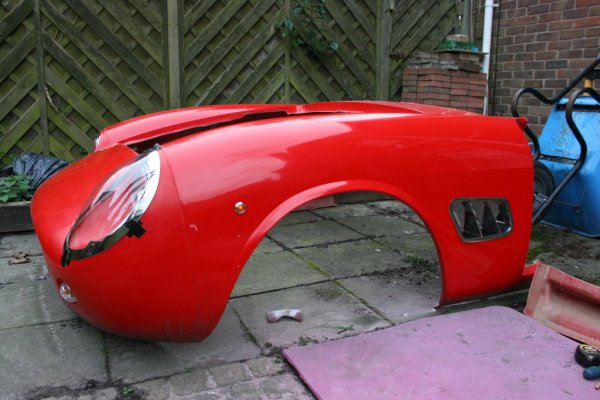
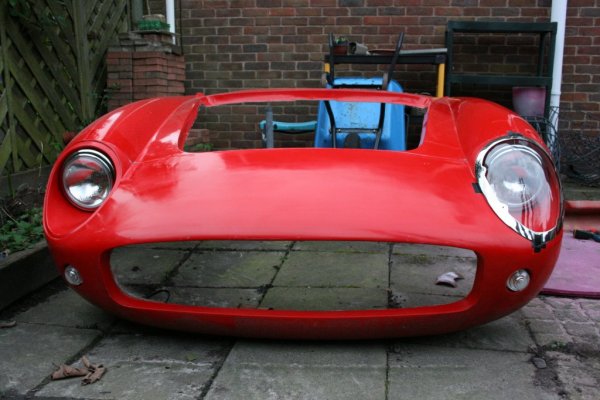
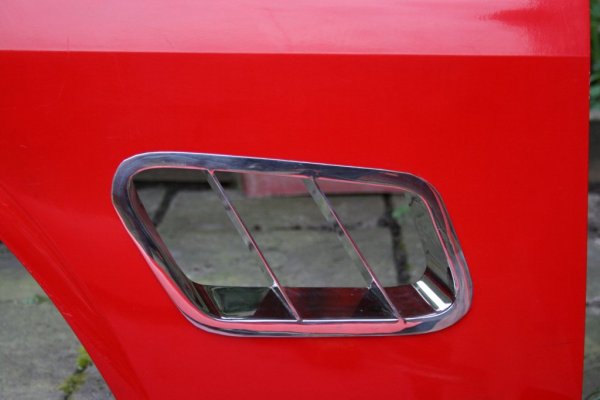
So here are a few pictures of the front end of my car as of today. All mould lines have been sanded back and filled. As said above the moulding is very poor, so much cutting, grinding, filling and sanding was needed to get it to a half-decent shape. There will still be work for the spray shop to do to make it look good.
I have spent a day grinding and sanding the stainless radiator intake cowl, as it was nowhere near fitting as purchased. Still needs so some work.
I have trial fitted all the lights, and front brightwork (except bumpers). The front driving lights/ fogs in the pictures will be changed to larger ones before final fitment.

IMG_9379.JPG
IMG_9380.JPG
IMG_9381.JPG
IMG_9382.JPG
 

Pond

Zorg Guru (III)
British Zeds
Joined
Dec 26, 2016
Points
144
Location
Spaldingski, Lincs
Model of Z
Z3 project and E89 Z4
To my disbelief the bonnet fits fairly well without much work. The same cannot be said for the bootlid. It is a Country Mile out.
 

Pond

Zorg Guru (III)
British Zeds
Joined
Dec 26, 2016
Points
144
Location
Spaldingski, Lincs
Model of Z
Z3 project and E89 Z4
I had my first little 'victory' today. As it has been raining on and off, I thought I would turn my attention to the wheels. I was forewarned that the front wheels wouldn't fit over the Z3 calipers without some 'adjustment'. This has been bothering me for a while, so I thought I would sort them out. A job that is not crucial at this stage, but, like many others, once it's done I can tick it off the list and not worry about it.

The hub adapters all fitted a treat. The rear wheels went on with no problem (smaller discs and calipers). Fitted the front hubs and offered the wheels up to see. I was expecting them to be way too small for the calipers. Grinding brake calipers down is not something that fills me with confidence, as it is a major safety concern going forward.

Turned out that only a few millimetres of the outer 'horns' and less of the main body of the calipers needed grinding back to make the wheels fit. I have no concerns about reducing the integrity of the calipers and the clearance is now a good 2mm.

I ground them back only where necessary, then sanded them with 40 grit decent paper to reduce the grinding marks. A couple of coats of Hammerite will make them look better than factory IMO.

The wires, with the spinners, do look exceedingly good. Tyres can wait!

IMG_9384.JPG
IMG_9385.JPG
IMG_9386.JPG
IMG_9391.JPG
IMG_9392.JPG
IMG_9395.JPG
 

Duncodin

Zorg Guru (III)
Supporter
Joined
Sep 8, 2021
Points
139
Location
Krähental
Model of Z
M44 FrankenZed
I had my first little 'victory' today. As it has been raining on and off, I thought I would turn my attention to the wheels. I was forewarned that the front wheels wouldn't fit over the Z3 calipers without some 'adjustment'. This has been bothering me for a while, so I thought I would sort them out. A job that is not crucial at this stage, but, like many others, once it's done I can tick it off the list and not worry about it.

The hub adapters all fitted a treat. The rear wheels went on with no problem (smaller discs and calipers). Fitted the front hubs and offered the wheels up to see. I was expecting them to be way too small for the calipers. Grinding brake calipers down is not something that fills me with confidence, as it is a major safety concern going forward.

Turned out that only a few millimetres of the outer 'horns' and less of the main body of the calipers needed grinding back to make the wheels fit. I have no concerns about reducing the integrity of the calipers and the clearance is now a good 2mm.

I ground them back only where necessary, then sanded them with 40 grit decent paper to reduce the grinding marks. A couple of coats of Hammerite will make them look better than factory IMO.

The wires, with the spinners, do look exceedingly good. Tyres can wait!

View attachment 301943View attachment 301945View attachment 301947View attachment 301949View attachment 301951View attachment 301953
Excellent. More like this please.
 

Pond

Zorg Guru (III)
British Zeds
Joined
Dec 26, 2016
Points
144
Location
Spaldingski, Lincs
Model of Z
Z3 project and E89 Z4
As said earlier, my bootlid was a Country mile out of fitting in the 'hole'. I really don't know who moulded my GRP, but all I can assume is they are either blind or just crap at what they do! Still; at least I only paid way over the odds for it!

So, for the last four days (yes four whole days) I have been making the bootlid fit. I have got the panel gaps to an even 3mm all around. I would have liked 2mm but I couldn't as in a few places they were just under 3mm as it came.
I have taken over 15mm (yes 5/8") off many parts of the GRP bootlid to get it to fit nicely. I did the whole lot with a sander and 60 grit paper. I was going to use the grinder to take a lot of the material off, but was worried I may slip. So did it the hard way!

I fitted the boot brackets (old Z3 ones modified a bit with elongated slots). The offside one needed slightly packing out on the tub side...around 5mm down to 0mm.
The offside, however, needed packing out by 14mm down to around 6mm. Again, the moulder has put the metal brackets bonded into the bootlid in the wrong place!
Once all sanded and corners shaped with varying paper down to 240 grit, I bolted the bootlid to the brackets. As I tightened it the nearside kept pulling down and ended up around 5mm 'inside' the body.
I was scratching my head for ages trying to work out why. Turns out the moulding on this side where the bracket holes are, is on a 20 degree slope (the offside is flat). So as I tightened the bolts, it was pulling the bracket out of level and pulling the bootlid down.

So I spent most of yesterday making a small wedge to level the bootlid back up! It has worked but I am not happy with how it looks, even though you can't really see it under the boot bracket. I shall re-address this at a later date.

The bonnet has also been 'fine tuned' to give a 2mm panel gap all around. It has a slight 'bow' in the centre so was sitting a bit low on both side at the centre. I taped some packers to the body and have put the bonnet on and held it down with some strong gaffer tape to try and 'remould' it. I will leave this for a good week or so.

I have also cut the boot lock holes.

A few pictures of progress:
IMG_9399.JPG
IMG_9407.JPG
IMG_9408.JPG
IMG_9400.JPG
IMG_9402.JPG
IMG_9403.JPG
IMG_9401.JPG
 

Pond

Zorg Guru (III)
British Zeds
Joined
Dec 26, 2016
Points
144
Location
Spaldingski, Lincs
Model of Z
Z3 project and E89 Z4
Then after all the hard work, I got two presents in the post.
One box contains my new seat foams, seat shiny bits, an super shiny ashtray and internal door pulls.
The other two big boxes are my stainless steel bumpers and over-riders all the way from Vietnam!

I do like a bit of bling!
IMG_9406.JPG
IMG_9411.JPG
IMG_9410.JPG


The only big ticket parts I don't have now are the instrument set. I am going to order these very soon (and get them programmed to the mileage of the car).
 

Jam03

Zorg Guru (III)
Supporter
British Zeds
Joined
Feb 21, 2022
Points
136
Location
Surrey
Model of Z
2.2i
When you look at the photos, you would never guess the hard work that you’ve put in to make it fit. It looks great!
 

Duncodin

Zorg Guru (III)
Supporter
Joined
Sep 8, 2021
Points
139
Location
Krähental
Model of Z
M44 FrankenZed
Good job getting things to fit.

But I still reckon you need to get the body onto the car. The panel fit might well be different when the body shell is supported by the chassis rather than standing on the ground.
 
Top